Google Indexing API is a type of free API developed to include pages with short-lived or temporary content, such as job postings or live broadcast events, in the Google index.
Google states that this API only works on these websites. However, as the problems started to increase, such as the pages not being indexed and the added pages being removed from the index again, the use of the API started to become more widespread and went beyond its main purpose.
How to Setup Google Indexing API?
To use the Google Indexing API on WordPress, you must first create a “Google Cloud” account and activate the Indexing API service.
Creating a Google Cloud Account
In order to use the Google Indexing API service, you must have an active “Google Cloud” account.
If you do not have an active Google Cloud account, you must create a Google Cloud account at https://cloud.google.com/contact
Creating an API Project
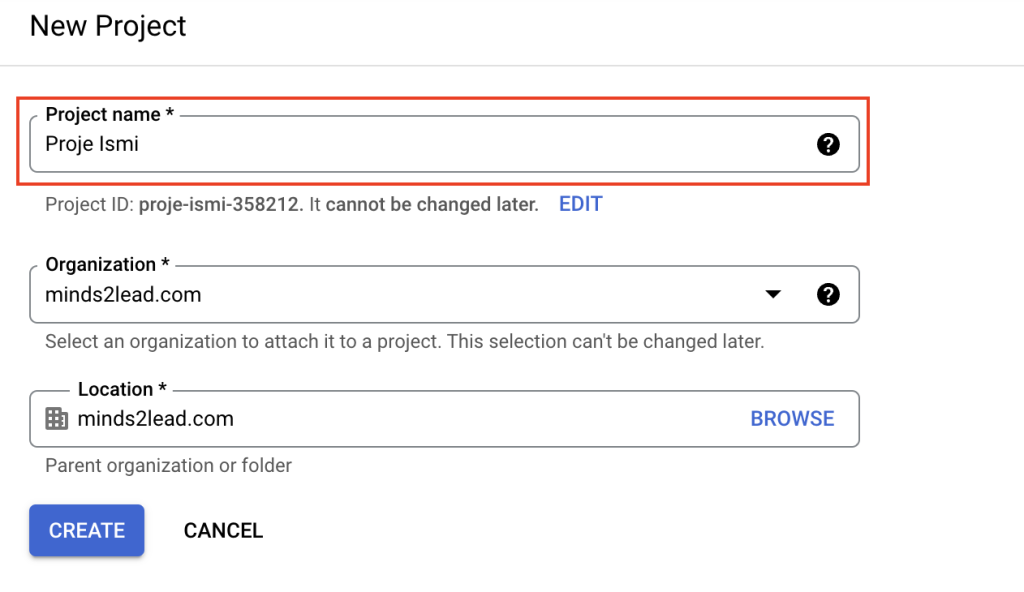
After creating a Google Cloud account, you need to create a new project in order to use the Indexing API service from the Google API Console platform as the second step.
To create a new project, you can go to the https://console.cloud.google.com/projectcreate page and fill in the “Project Name” section requested from you with the name of your project.
Creating a Service Account
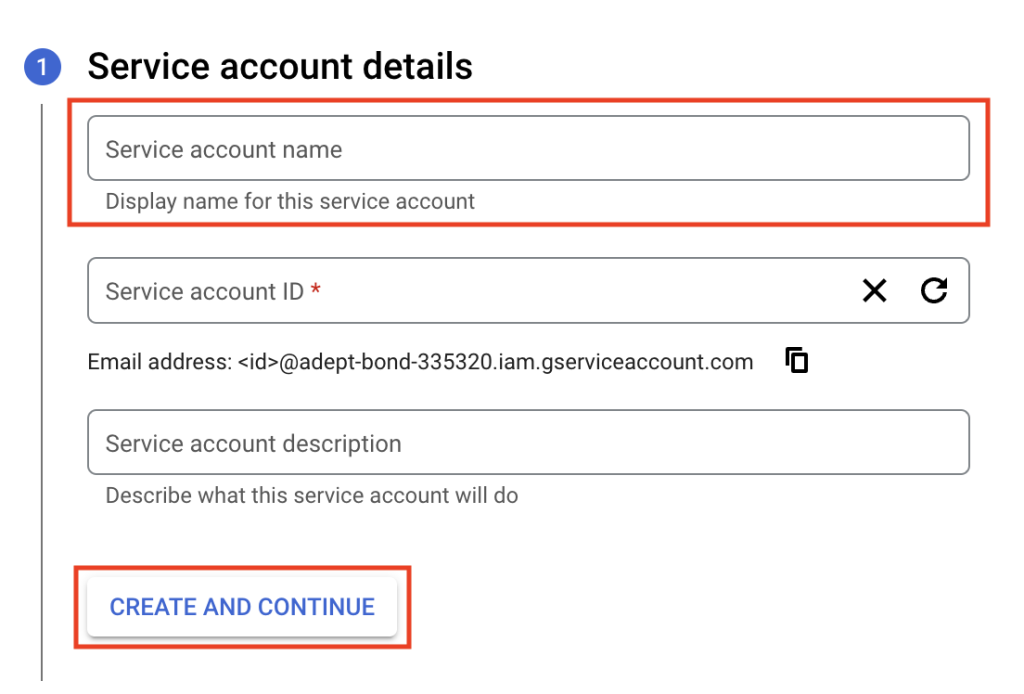
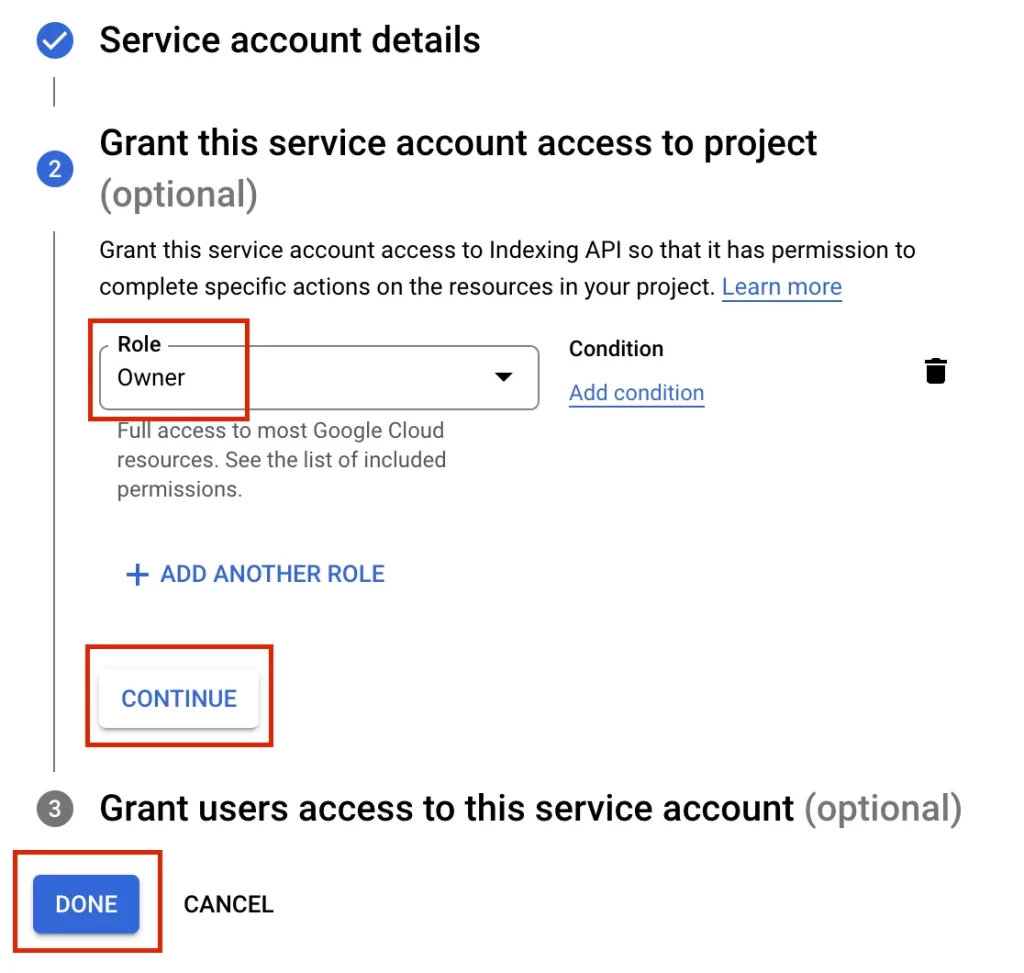
After creating a Google Cloud account, you need to create a new project in order to use the Indexing API service from the Google API Console platform as the second step.
To create a new project, you can go to the https://console.cloud.google.com/projectcreate page and fill in the “Project Name” section requested from you with the name of your project.
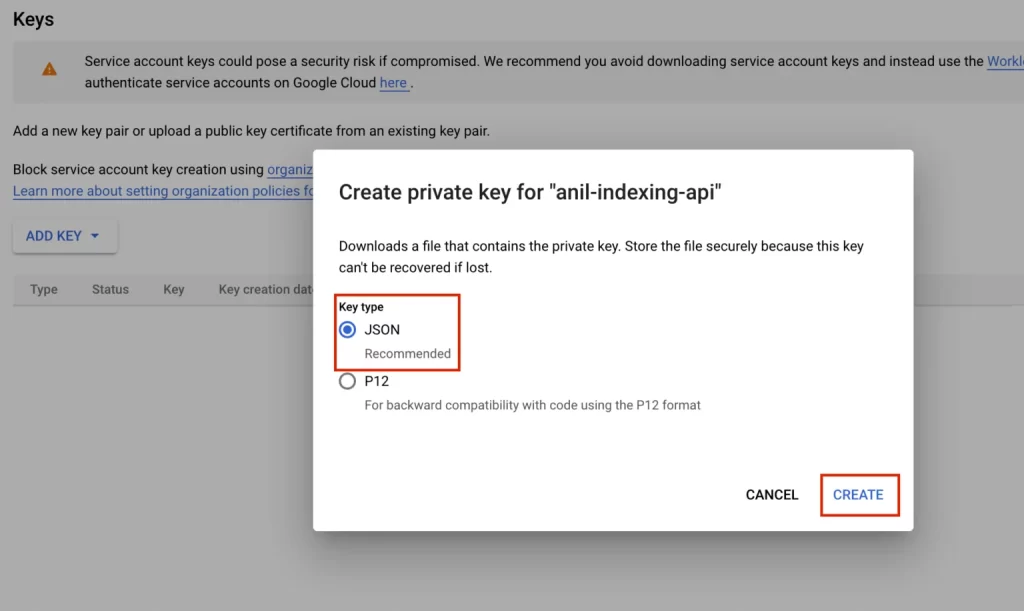
Creating API Keys
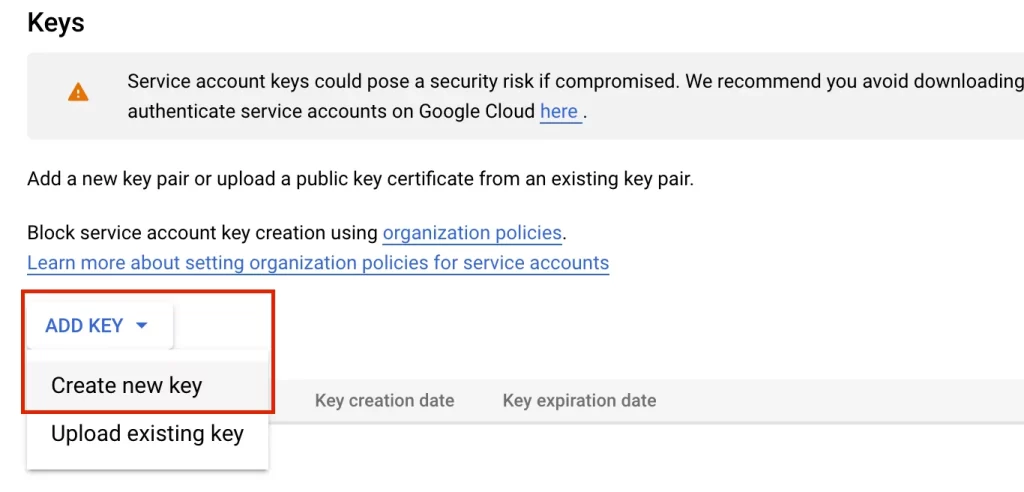
In order to use the Indexing API on Google Cloud, after creating the project and service, you must also enable the Indexing API service at https://console.cloud.google.com/apis/library/indexing.googleapis.com .

Search Console Owner Authorization
When creating a project and service on Google Cloud, you must authorize the e-mail address of the Indexing API service created specifically for you in your Search Console property in the “Owner” status.
With this authorization, the Indexing API service will become operational, and you will be able to send requests such as URL indexing, removal and updating with your Search Console link through the Indexing API for your URLs.
WordPress Google Indexing API Setup
After completing the steps above, if you have WordPress sites, we will tell you how to take advantage of the fast index. There are plugin installations required for this. What you need to download is the Instant Indexing for Google plugin. First download and install this for WordPress fast indexing.
After installing the plugins, point to the “Rank Math” settings in your admin panel and click on the “Instant Indexing” option from the drop-down area.
Open the “Google API settings” field from the settings section that appears and upload the Google Index API JSON file you downloaded to your computer to the plugin. While doing this, do not forget to select the Post type as “Posts” or “Pages”.
After uploading the JSON file, you are now ready to use the fast indexing API. To do this, go to the “Console” area on the plugin. In the field that appears here, enter the URLs that you want to send the API to and thus notify the Google bots. Then select the query you want to do. These are new URL submission or update, URL removal request and URL status checking options. After selecting them, press the “Send to API” button.
This is how fast indexing processes are completed.


